
At PayU, we believe in innovating products that integrate well with business’ existing products/processes and solve for their payment needs.
This time, we collaborated with Scaleup Anchors, a 5-star certified Tally Partner, to develop a solution that enables Tally users accept, track and reconcile payments right from their Tally software. Tally users will now be able to send payment links against their customers’ invoice via Email or SMS and track the real-time status of these payments. We are proud to share that this is first of its kind solution to accept digital payments within Tally.
Here’s a step by step guide on how to collect, track and reconcile payments in your Tally software. The guide includes the following 3 sections:
- Deploy & Activate PayU in Tally
- Send Payment Links with your Tally invoices
- Track and Reconcile Payments
1. How to Deploy & Activate PayU in Tally
Step 1: Download the PayU Patch from https://partner.payu.in/tally

Step 2: Drag and drop the PayU Patch file in your Tally Installation software folder. Here’s how:
- On your desktop, create a new folder named TDL
- Copy the downloaded PayU patch in TDL folder
- Copy TDL folder to Tally install location
Step 3: Deploy PayU Patch
- Open Tally and click on the “Feature” tab at the bottom right section
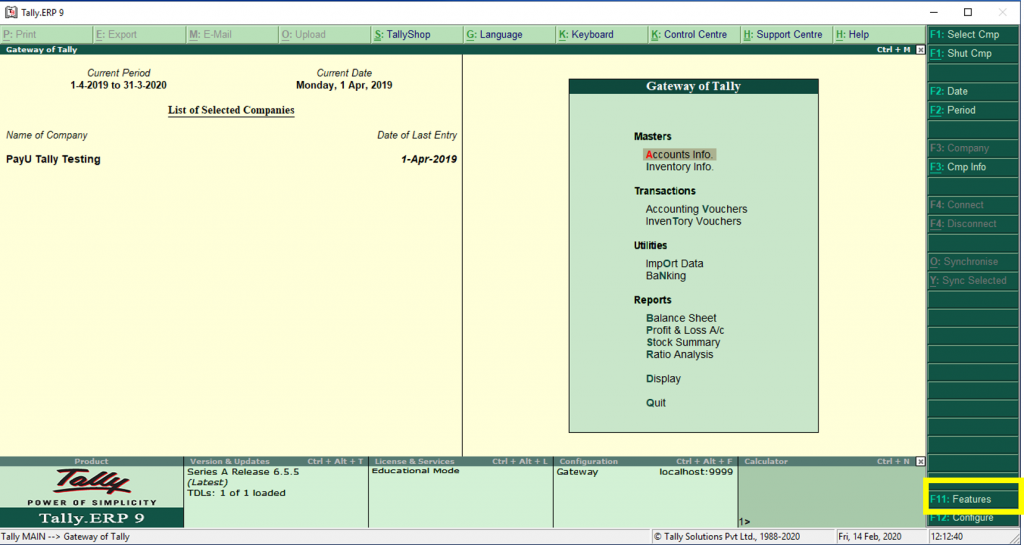
- Now, click on “Add on Features”

- Type “Yes” under Enable Online Payment Link & “Accept”
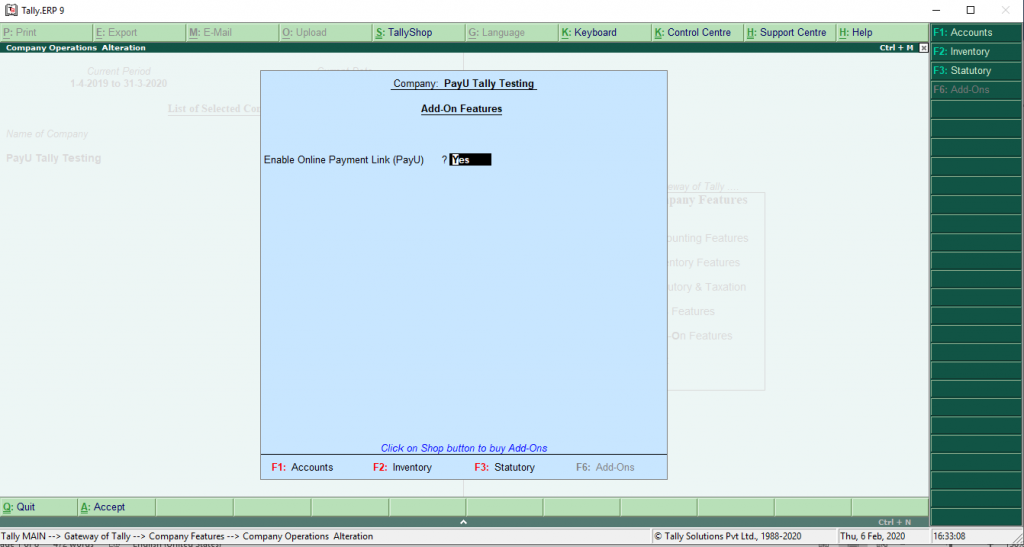
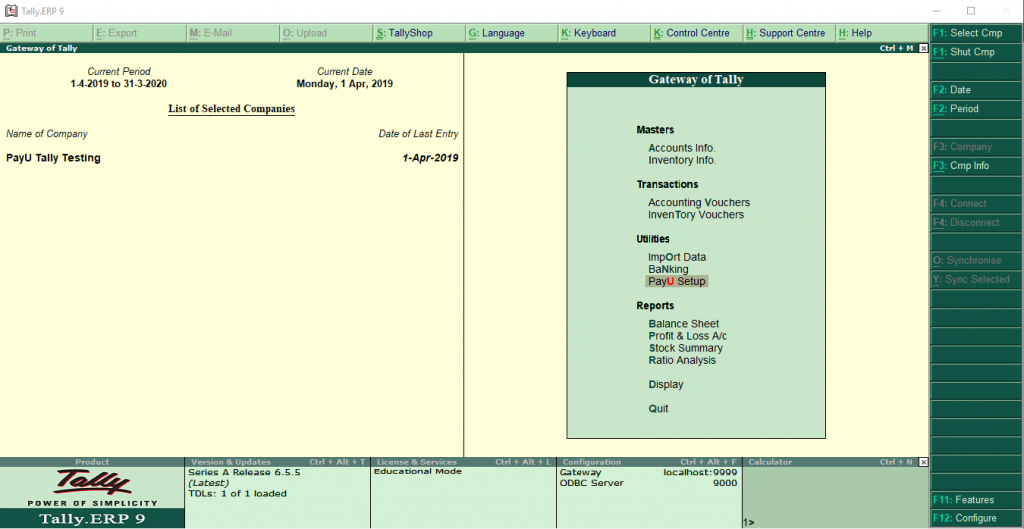
Your PayU Patch is now deployed. PayU setup button will now be visible on Gateway of Tally.
Step 4: Activate PayU in Tally
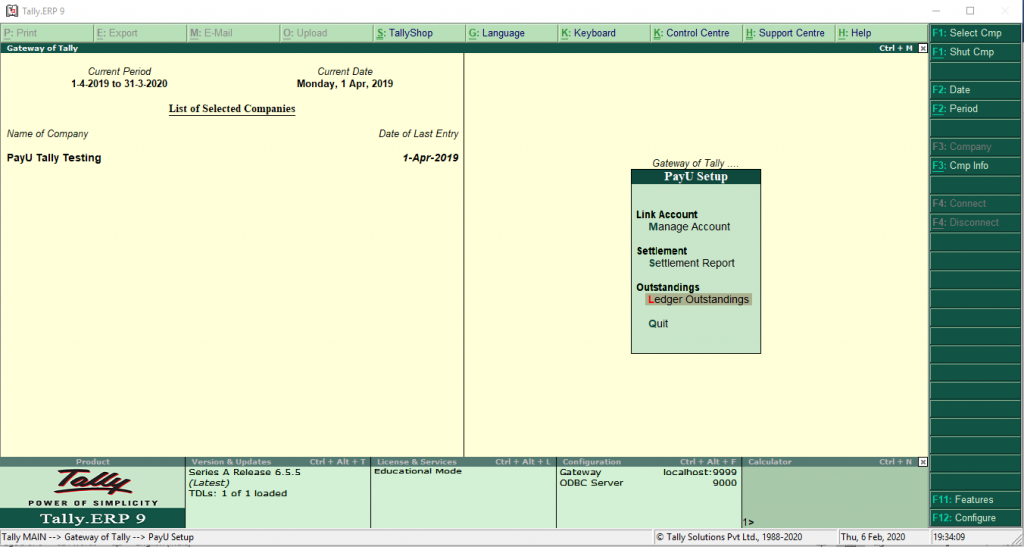
- Go to “Gateway of Tally” and click on the “PayU Setup” tab in the “Utilities” section
- After landing on the PayU setup page, click on “Manage Account” to go to the login page

- Now, if you don’t have an account with PayU,
- Click on the “NEW USER” button on the login page

- You will be redirected to PayU’s landing page. Click on “Sign Up for Free” button, select your Tally channel partner. If your partner isn’t listed, choose alternate options and click on SUBMIT

- You will be redirected to PayU’s onboarding page. Follow easy onboarding steps and set up the account instantly! Here is a 2-minute video to help you set up an account on PayU, in minutes

- Click on the “NEW USER” button on the login page
- If you already have a PayU account,
- Enter your PayU credentials – User ID, password and Merchant ID – on the login page. Your PayU account is activated and you can send payment links in your Tally invoices now!

Note: OTP login will not work at this point. To re-confirm your PayU credentials, go to your PayU dashboard.
- Here’s how you can find your PayU credentials:
Merchant ID – Click on the Profile tab at the top right corner of your PayU dashboard. Under the “General Details” tab, you will find your Merchant ID.

- Enter your PayU credentials – User ID, password and Merchant ID – on the login page. Your PayU account is activated and you can send payment links in your Tally invoices now!
2. How to Send Payment Links in your Tally Invoices
Once you deploy & activate PayU in your Tally software, you can collect payments by sending payment links in your Tally invoices easily.
Step 1: Go to “Gateway of Tally” menu, click on “PayU Setup and go to “Ledger Outstandings”

Step 2: Select a contact from the list of ledgers

Step 3: Select the invoice you wish to collect the payment for using the space bar and click on the “Send Pay Link” button on the right tab or use CTR+C for a shortcut
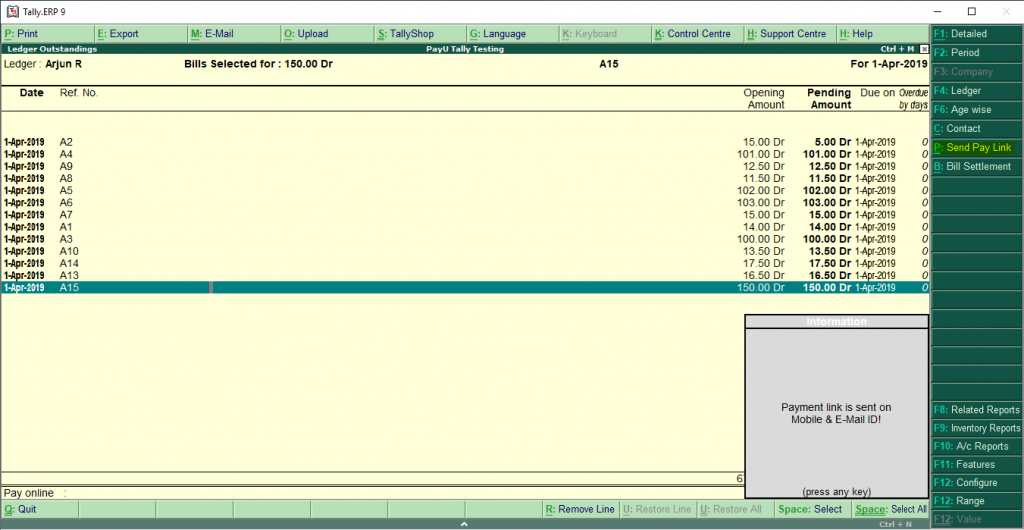
Note – The payment link is sent on your customer’s registered mobile number and email ID. Therefore, make sure you have added contact details of your customers before sending them links
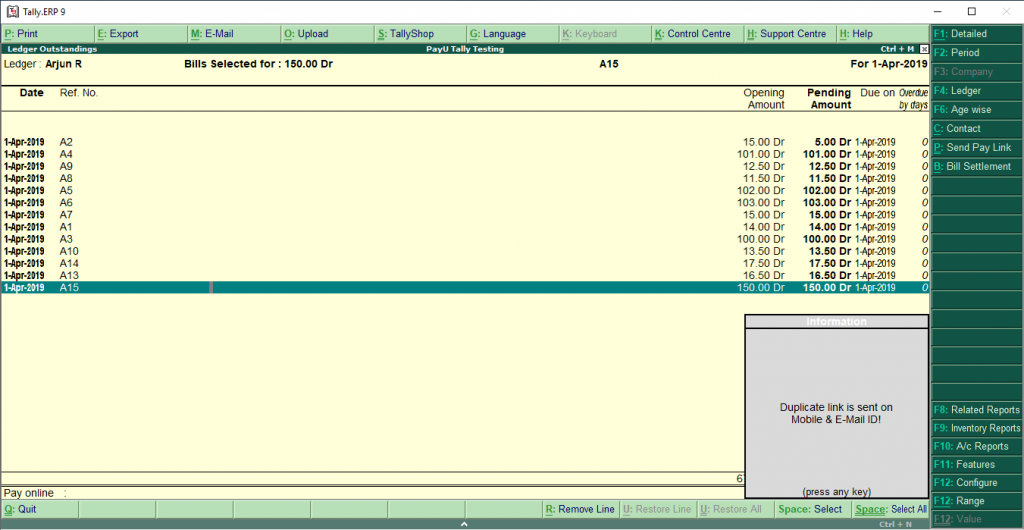
You can resend a duplicate link/links at any time by going to the “Ledger Outstandings” and triggering “Send Pay Link” again
The payment link can be triggered in one click when a Sales Ledger is being created if the Tally print function is enabled. On creating a print preview, a payment link can be triggered to customers. You can disable the link by turning off the print function in Tally
Step 4: When a customer receives a link, he gets an option to make a partial or full payment. In case of partial payments, customers can make the balance payment anytime later using the same payment link.
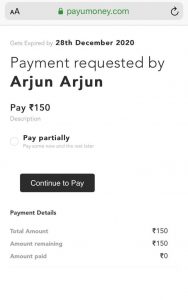
Step 5: Your customer can click on the payment link and choose to pay via any payment mode – Credit card, Debit card, Netbanking, UPI and Wallets. One the payment is successful; money will be settled to your bank account.
3. How to Track & Reconcile Payments
Now that you have sent the payment links, you can see the status of payments for all your customers, by following these simple steps:
Step 1: Go to “Gateway of Tally” and click on the “PayU Setup” tab in the “Utilities” section.

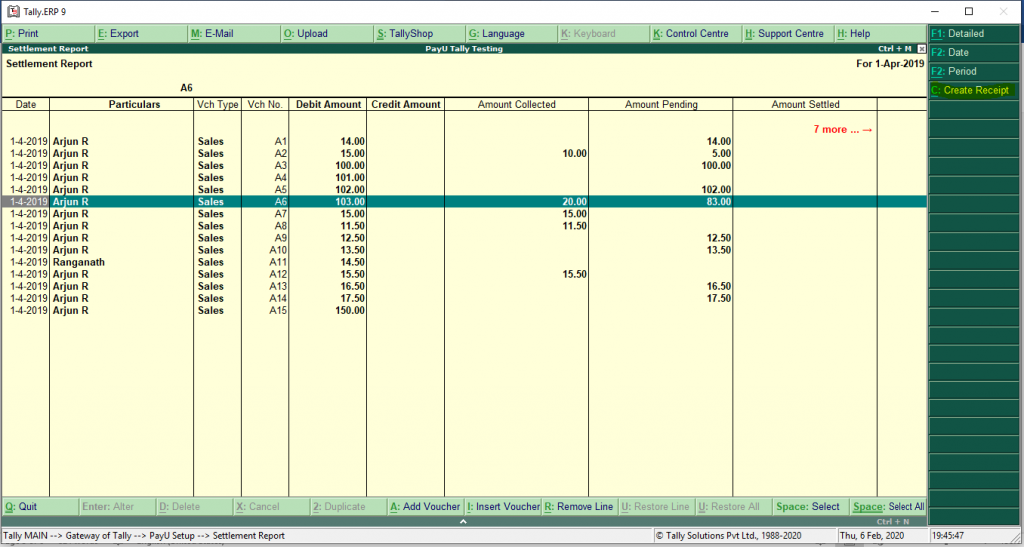
Step 2: In the “PayU Setup” box, click on the “Settlement Report” in the “Settlement” tab.

Step 3: Select the invoice for which you wish to see the payment status and press ENTER. You will be able to check the partial payment status and the amount settled into your bank account and all other details of this invoice on the screen.


Once you exit the invoice- the payment status along with other details of the link will be populated on your screen.
Note – To refresh the payment status of the link, you will need to select and re ENTER the invoice.
Step 4: To create receipt for invoices, go to “Gateway of Tally”, click on “PayU Setup”, click on “Settlement Report” and select the invoice against which you want to generate the receipt and click the CREATE RECEIPT button on the Tally control tab on the right
Note: You can generate receipt for a partially-paid invoices also.
For any difficulty that you might face, reach out to tally.support@payu.in and we will be happy to assist you. Trusted by more than 3.5 Lakh merchants, PayU is India’s largest payments service provider. To know more,


Leave a Comment